


As Amazing as CLIP STUDIO PAINT is, it
does not yet have (as of August 2020) a way to write text on a
curve. BUT I have come up with a hack. There are other hacks on
the web, but I like mine best. Because it's ... easy. I like
easy. What we're going to do is make a Custom Brush.
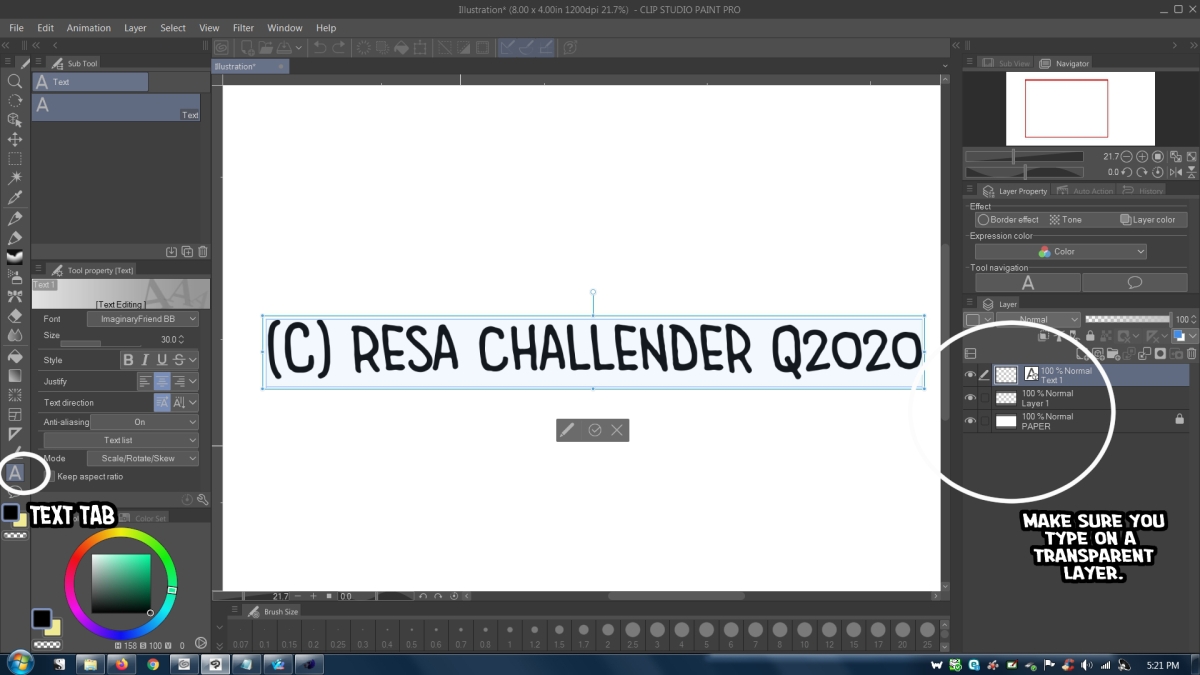
So, go to the Text tab and write out your
line of text. Think hard about the kind of type you plan to use,
because how it looks on the page after you write it is how it will
always look. So be creative! Which, since I'm just wanting a
more creative signature for my art, I am not doing.
You should know that I believe in OVER
EXPLAINING. And with that:
1. Open the Text Tab and write out the
line you want to be able to Write on a Curve (kinda sorta).
 2.
2.
2. Now you need to rasterize the text.
Then select the text, leaving a little bit of room on both sides, so you
can have gaps between the sentences if you want more than one text set.
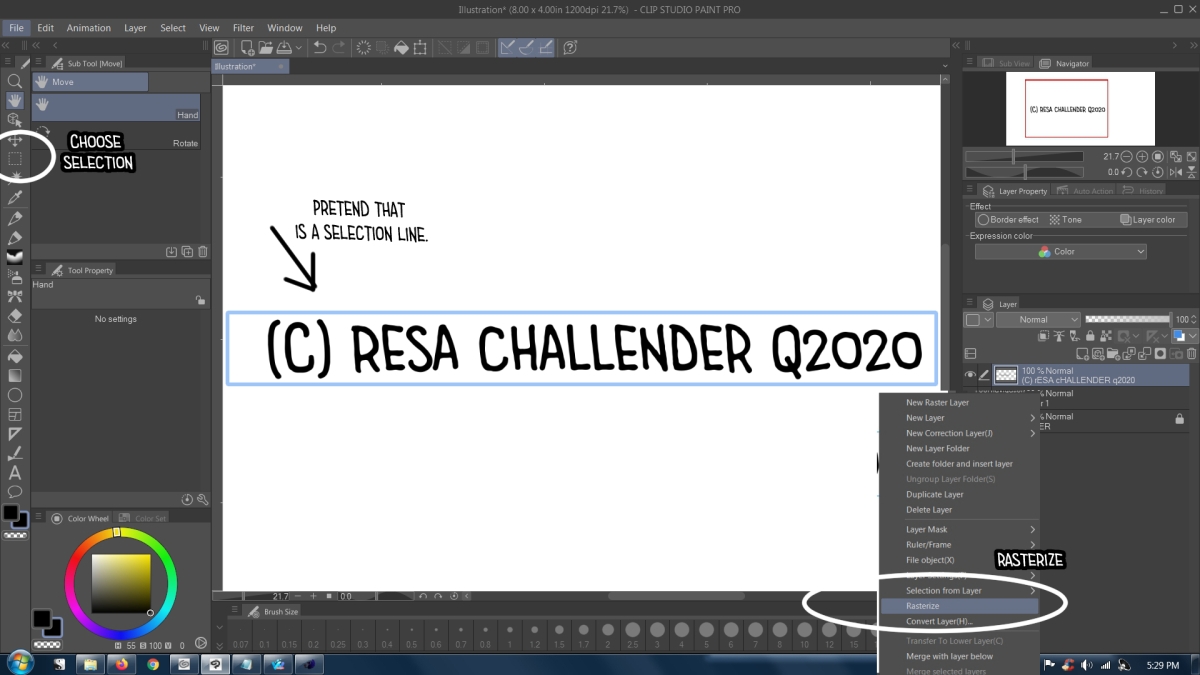
3. Okay, those images ... aren't quite in order. So again, write
text. Rasterize. Select text, leaving a gap o both sides so
you can loop the text. Yeah!
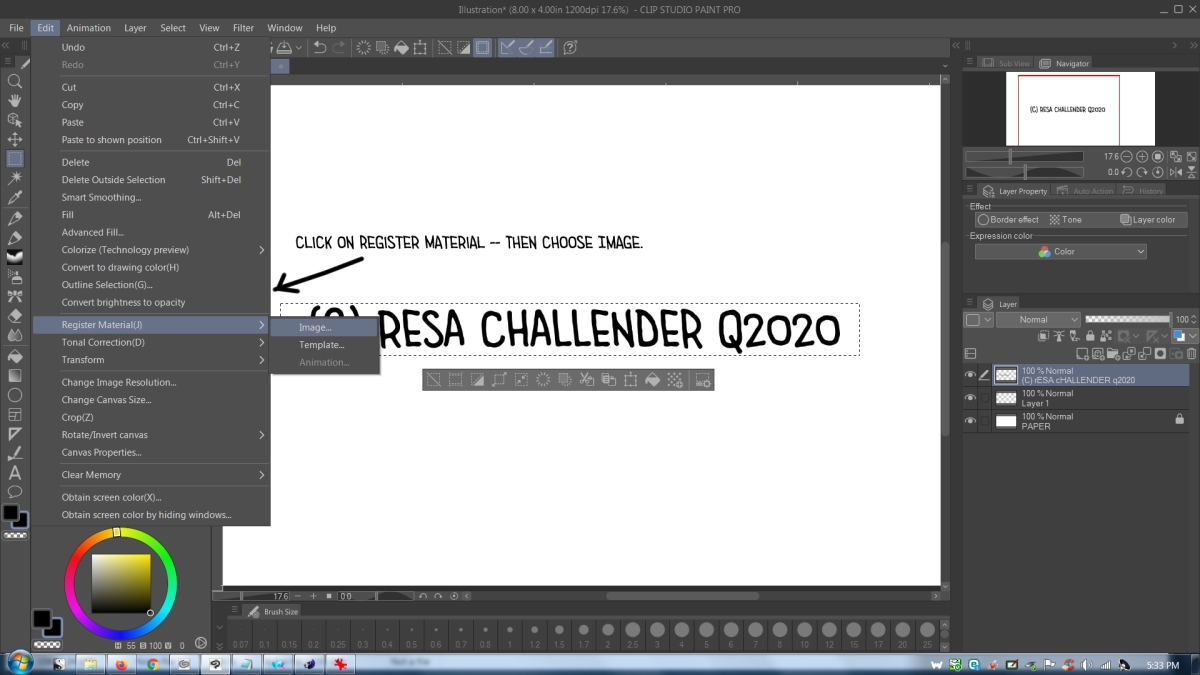
THEN! Under Edit, choose Register Material. Then choose
Image.
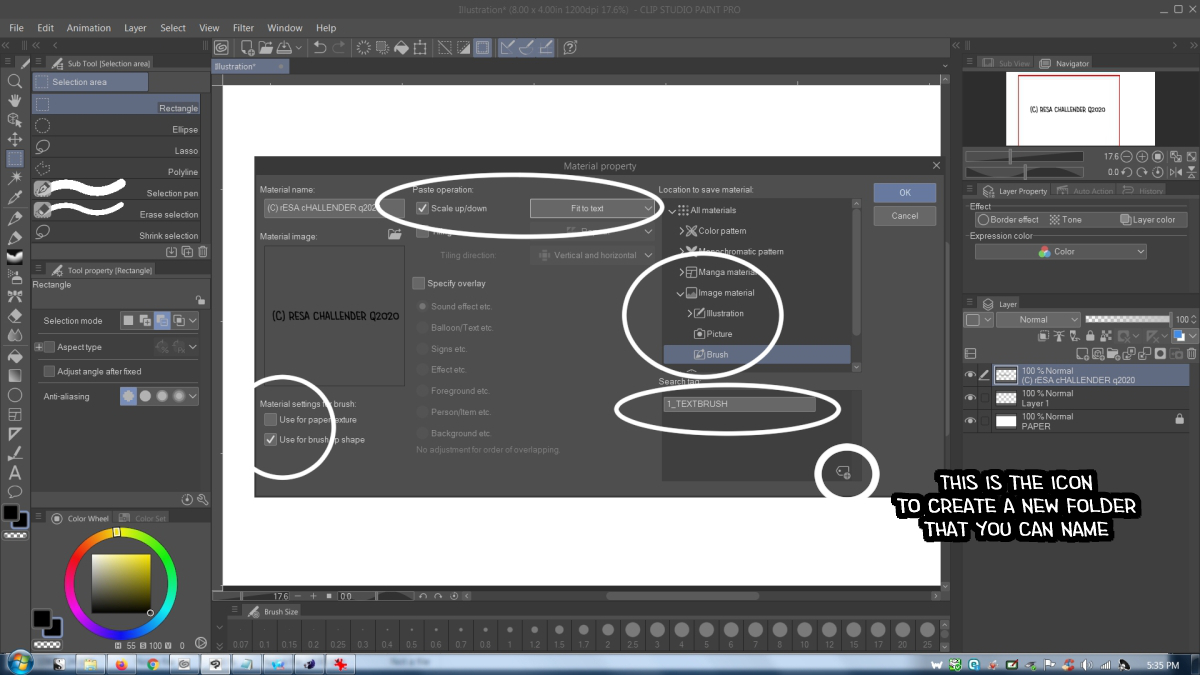
4. Now note all the things that I have checked here. Brush
Tip. Yes. Scale Up/Down. Yes. See drop down, choose
Text. Then click Image Material and click Brush Tip. And
Lastly, Create a Folder and name it something that you can remember.
5. Now that you have your brush tip all ready to go, you need a
brush to use it in. It needs to be one that already does most of
what you want. I suggest that you choose the one I choose --
Tirolean Tape -- and duplicate it so you don't screw up the original
one.
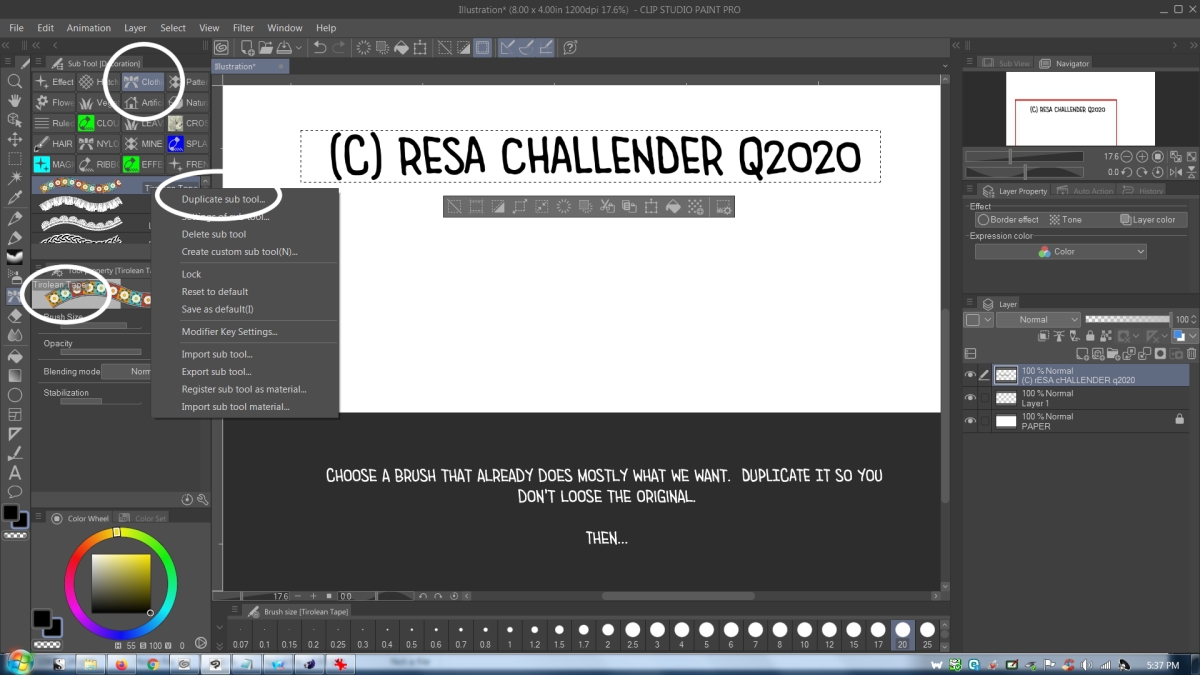
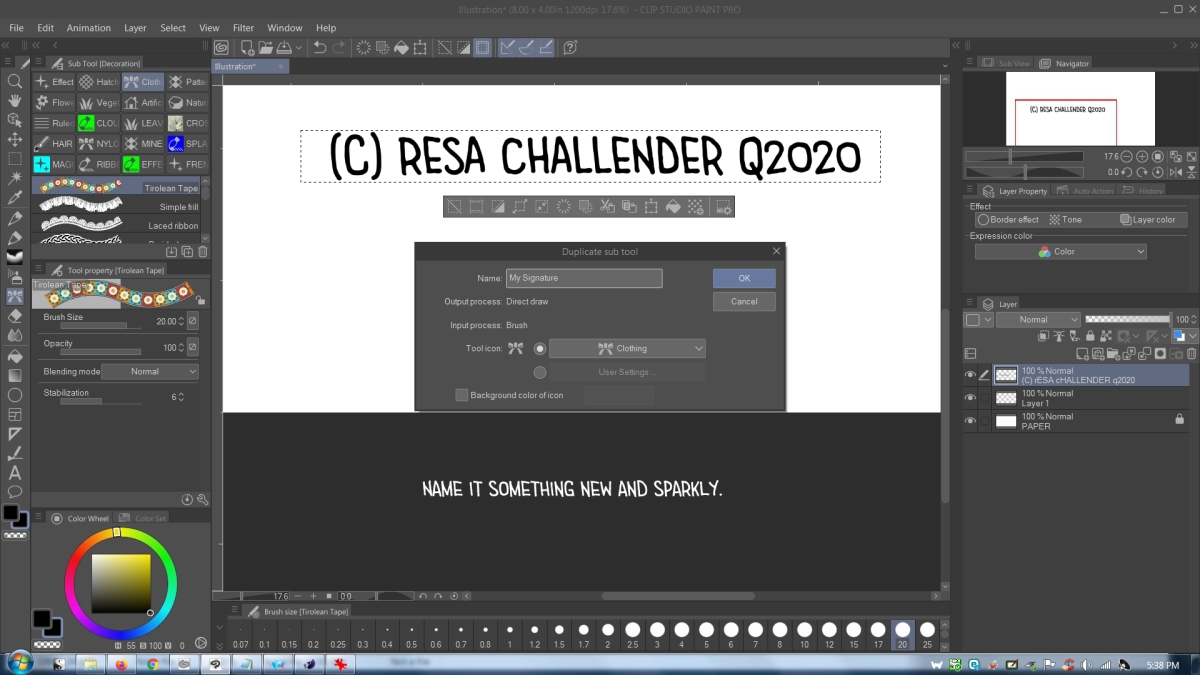
6. Then, right-click on the new brush (it'll be at the bottom of the
list) and choose "settings for sub-tool". Change the name and call
it something cool.
7. Now you have a brush to play with.
Click on the wrench to open the advanced panel. Then click on Brush
Tip to go in and DELETE all of the brush tips.
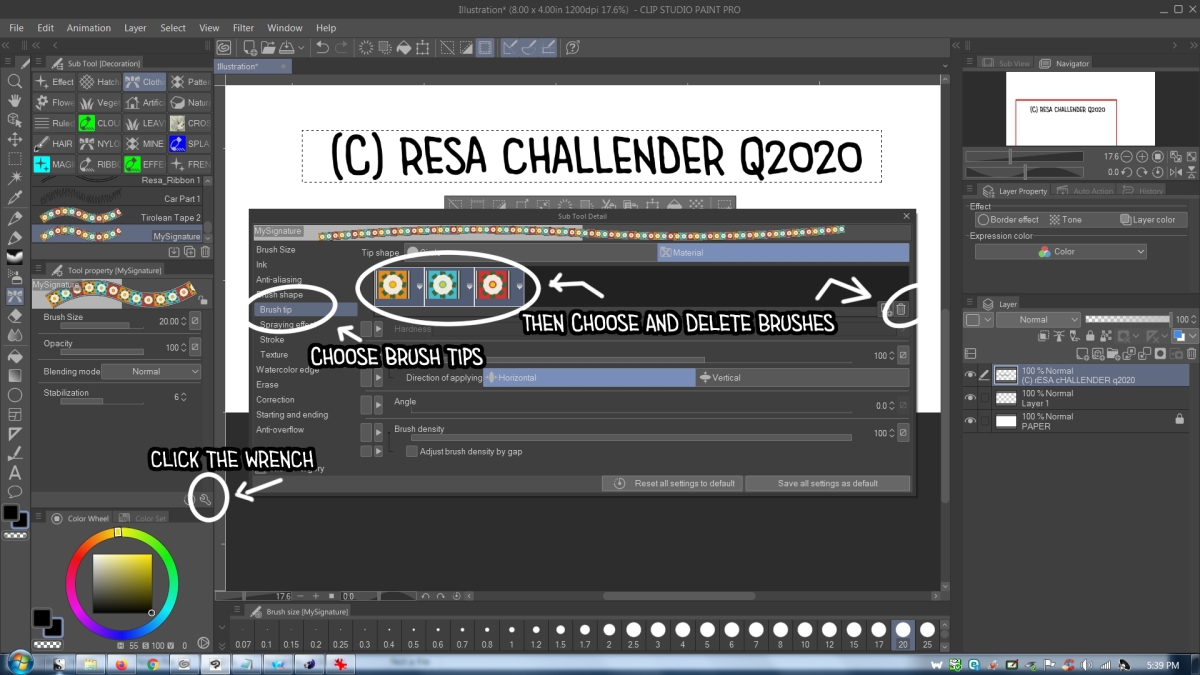
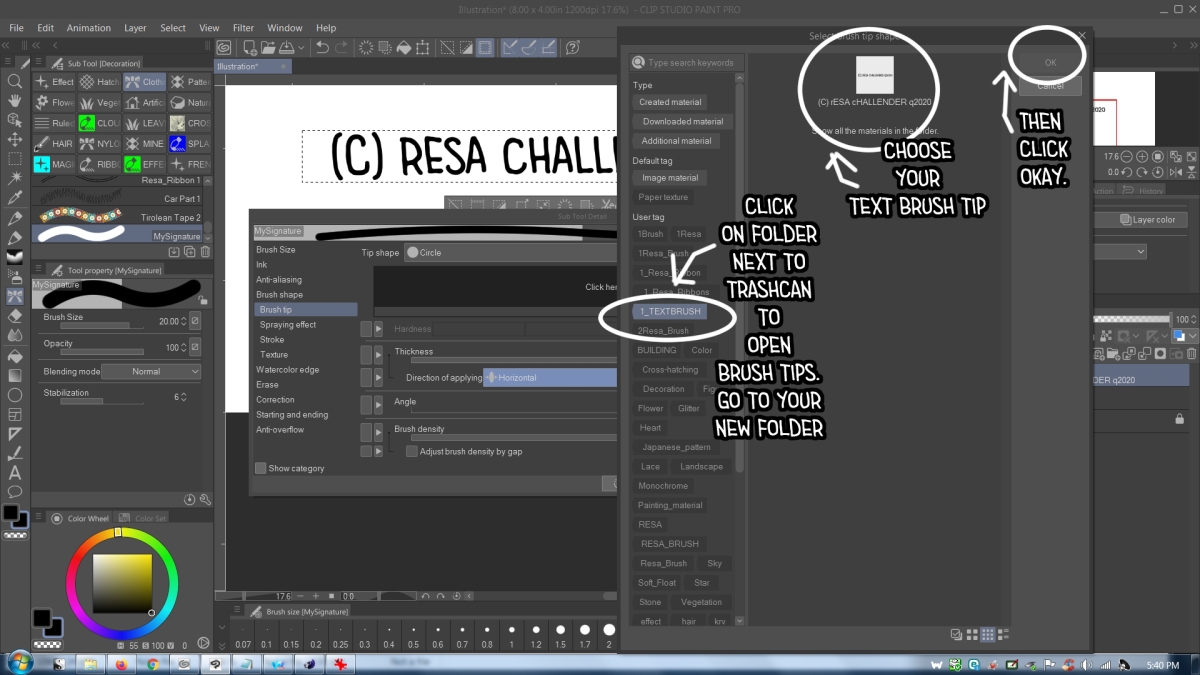
8. Now, next to the trashcan is an icon for the Materials. Click
that. And find that new folder you made for your Text Brush
Tip. Choose your Text Brush and click OK.
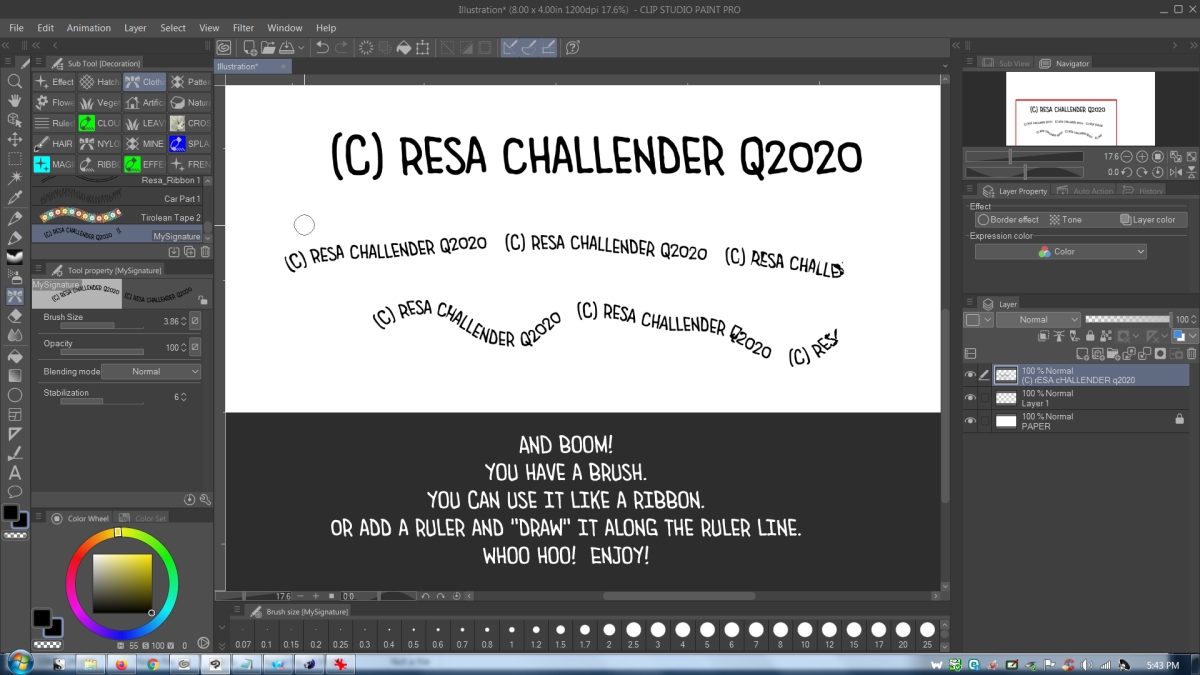
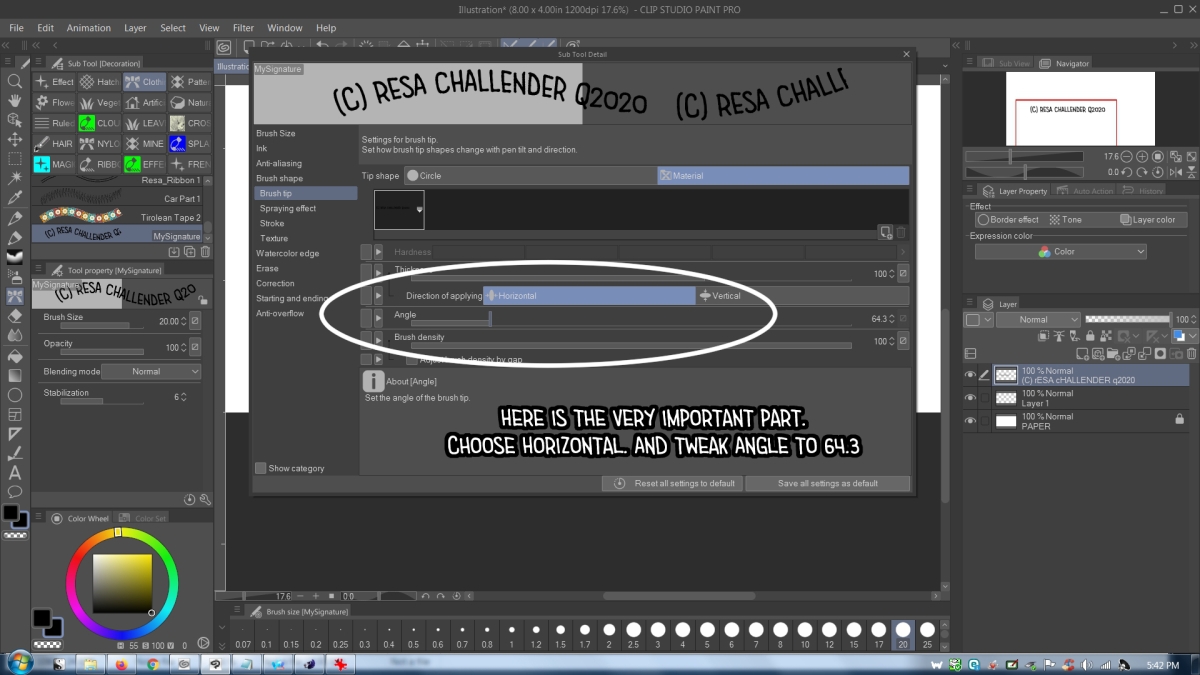
9. Now is the LAST and VERY IMPORTANT PART. Right now, you'll notice
that the text brush looks whacked.
To fix that, choose the direction: Horizontal. And Reset the Angle
to 64.3. Then your text will line up like the one on my text
widow. Whoo!
10. And you are done! You have a brush you can DRAW with. Or
open a circular ruler and use it to draw along. AND BOOM! You
can now write text along a curve. Whoo!